Cursive Names
Lori in Cursive
The name Lori in cursive: stroke-by-stroke animation, letter joins, a trace check, and a free printable worksheet.
Lori takes 3 strokes to write in cursive — the capital L on its own, then o-r-i in one continuous stroke; then go back to dot the i. The animation below draws it on the writing lines exactly the way children practice it in Scribble; trace it after, then take the worksheet to paper.
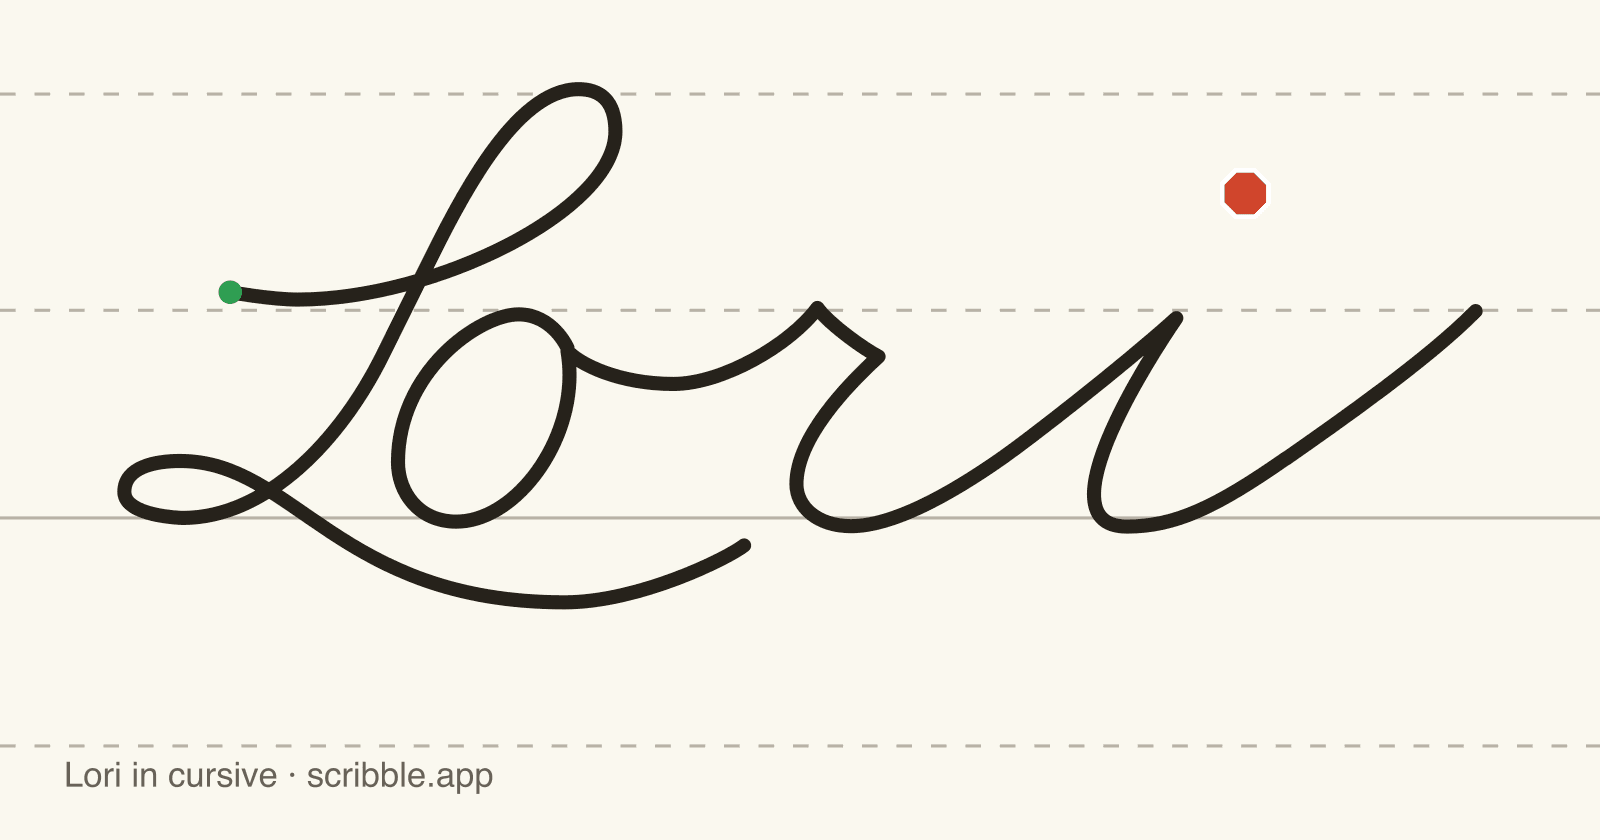
How to write Lori in cursive
- 1Write the capital L, then lift the pencil.
- 2Write o, r, i as one continuous stroke, joining each letter to the next without lifting the pencil.
- 3Go back and dot the i.
Size is what makes Lori readable: full-height capital L and midline-height o, r, and i. Uneven heights are the most common mistake, so check each letter against its lines.
How the letters in Lori connect
Follow the joins as you write Lori: o ends on a checkstroke that carries into the undercurve opening of r; r ends on an undercurve that carries into the undercurve opening of i. Remember: the capital L stands alone, so lift the pencil before the next letter.
The letters in Lori
Shaky on l, o, and r or any of the others? Open the letter's own guide below for its stroke order, joins, and practice sheet.
Trace Lori in cursive
Now write it yourself. Put your finger or mouse on the green circle and follow every stroke of Lori — the check only advances while you stay on the line.
Put your finger or mouse on the circle and pull it through the first stroke.
Free printable Lori cursive worksheet
Print the free Lori in cursive worksheet to move from the screen to paper: trace Lori along the dashed models, write it starting from each green dot, copy it beside the model, then fill the blank writing lines on your own.
Need a different name? Make your own name tracing worksheet — free, for any spelling.
Frequently asked questions
Practice writing Lori with real feedback
Scribble teaches cursive this same way on iPad — watch, trace, write, and get feedback on shape, size, spacing, and slant.